Gotlandsdricka – Review

DSC_0073

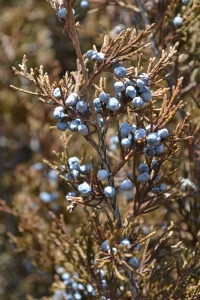
Juniperus virginiana

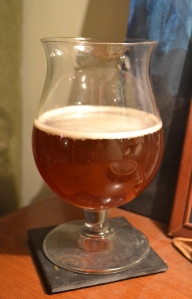
There is now absolutely no doubt in my mind as to why this is one of the most famous of old European beer recipes. The adaptive recipe that I followed to produce my own take on this profoundly flavored and legendary beer noted that the finished beer would take about a month to fully carbonate in the bottles. Despite this obvious instruction, I couldn’t help but sample this beer early, and to be honest it was carbonated enough. There wasn’t much of a head, but I’m sure this will improve over time. I also wanted to know if this was going to turn out to be another one of my sweeter recipes (which isn’t bad but on many occasions I was hoping for something bitter) or whether I had indeed added a sufficient amount of non-hop ingredients to sufficiently bitter and flavor the beer.

Turns out I was well rewarded for my impatience, more than rewarded in fact. The 1.3 pounds of freshly harvested juniper (from less than 1.5km away I might add), boiled and then steeped in the fermenting wort have imparted an enormous and completely crazy flavor profile. I’ll try to do my best to describe it.. but you had better swing by and grab yourself a bottle or two to truly appreciated it.

The aroma of this specialty herbal dark ale invigorates with sweet evergreen resins, turpentines and hits of wintergreen, peat and oranges. The flavor is lush with fragrant citrus, accompanied by the almost overwhelming and entirely unique coniferous complexity of juniper. It is overall pleasantly bitter with a lingering, tannin-rich and menthol-like aftertaste.

Considering the purity of this recipe (there are no other ingredients other than malt extract and yeast) this beverage can also be considered a medicinal tonic, as the amounts of juniper distilled into this beer are strong enough to effectively transmit its therapeutic properties. I would consider this recipe an effective digestive stimulant, urinary tract-antiseptic and astringent. Juniper possess potent anti-viral and anti-bacterial properties that cleanse the urinary system and also rid the intestines and colon of undesirable bacteria. The astringency aids in digestion by stimulating the liver and gall-bladder to produce digestive enzymes and also reduces inflammation and swelling.

You can bet that I am going to be re-visiting this recipe. I was having an internal conflict about what I thought my favorite home brew recipes were in my previous post involving the making of Gotlandsdricka but I’m convinced that this recipe trumps them all. Something cleansing, woodsy, wild and untamable. A few bottles are definitely going to be aged for the cold months to come, inevitably, in the future. Might be fun to hop this buddy up and try to convert it into an IPA, but I love it de-hopped, just over-the-top pure juniper; savory and delightfully rich. I wouldn’t change a thing to this base-line recipe.

westerberg5

Winter Sprucer – Review

Winter SprucerThis recipe matured a whole lot faster than I expected. Once again, my lack of patience got the best of me and I couldn’t help but sneak a peak of my winter sprucer, which was bottled on the 4th of December, although I’m sure it will develop further character with a little bit of aging. To begin with, I’m pretty impressed. I got buffeted by some staggering levels of delicious from this one. The flavor is sufficiently bittered, but not to excess, with a light maltiness shining through. The aroma is rich in bright, tropical scents akin to pineapple and orange with a floral chamomile undertone. The initial flavor is a nice balance of light chamomile and malt, the aftertaste being dominated by a wonderfully potent and lingering flavor of roasted toffee accompanied by the essence of the deep winter woods; conifer boughs and sweet resin. As with all of my alcoholic experiments, I have not idea what the alcohol percentage is because I can’t use a hydrometer (All of my hippie ingredients throw off the measurements which are required to determine the gravity readings)

I am really proud of this recipe, and will most certainly use spruce tips again in future recipes, perhaps with an even greater volume being made in a single go. Together with the Earth hop gruit ale, I am pretty confident to say that these have been my best beers to date. With my Gotlandsdricka currently finishing it’s fermentation, I have high hopes that it will turn out to be another winner. As diverse as the craft beer in scene is Ontario, I’ve got to say that I think there is fundamental fault that has resulted in a shriveled variety of ingredients in beer. Although some recipes incorporate herbs other than hops, the majority of beers that are mass produced are made with the same 4 ingredients, occasionally one or two others. By ‘thinking outside the hops’, the experience of a beer can explode with potential and include the widest range of bittering, preserving and flavoring ingredients. But that’s just little ol’ me talking.

4.5westerberg

Gotlandsdricka

Juniperus communis

Gotlandsdricka is a traditional ale that was brewed almost exclusively on the island of Gotland which lies off the coast of Sweden. The recipe included smoked barely malt extract and the boughs or berries of juniper (Juniperus spp.) trees which proliferated on the island. Juniper species are found throughout the north and south temperate world and also on any existing mountains in tropical regions. The common juniper, Juniperus communis, was the preferred species used in brewing Gotlandsdricka likely because it was abundant in the north temperate region of northeastern Europe where this recipe and many similar ones began being practiced.

For all intents and purposes, the majority if not all Juniperus species can be used to produce beer because, at least for me, they all tend to have a similar scents, flavor and medicinal properties. Juniper boughs and particularly the berries impart a citrus-like resiny flavour to the beer, as well as supplying plenty of tannins to bitter it. The plant also possesses strong anti-bacterial and anti-septic properties, and has long been used to help fight respiratory infections and cleanse the urinary tract.

Ironically, the common juniper is anything but common where I live in southern Onatrio. The species tolerates colder conditions further north with less biological diversity and therefore less of an opportunity for other species to occupy its preferred habitat. Instead, the pencil-cedar or eastern red-cedar, Juniperus virginiana, (despite being called ‘cedar’ it is in fact a true juniper) is quite locally abundant in open fields, fencerows and meadows. This species grows to a larger stature than the often squat J. communis, which provides more foliage to harvest with a decreased risk of over-harvesting and weakening the plant. I have however, included a small amount of J. communis berries in order to supplement the authenticity of this recipe.

Freshly collected Juniperus virginiana boughs & berries

Freshly collected Juniperus virginiana boughs & berries

I would definitely like to revisit this recipe by using fresh smoked malt and not malt extract which I have been using entirely up to this point. I did happen upon some darker malt than usual, so I’m going to interpret that as I was supposed to make this recipe now. So it isn’t entirely traditional, but the juniper is in there and that’s pretty much the point from what I understand.

Ingredients:

4 gallons water
3 litres dark amber liquid barley malt extract
1.3 pounds fresh juniper boughs with berries – Juniperus virginiana
1 ounce dried juniper berries – Juniperus communis
7 grams brewing yeast

Instructions:

1. Boil juniper boughs, berries and malt extract for 60 minutes.
2. Allow wort to cool to at least 75-80 degrees F
3. Pour into fermenter (including juniper boughs / berries) and add yeast.
4. Strain and bottle when fermentation is complete.
5. Age one month before consuming.

Winter Sprucer

Spruce has been a plant I have long wanted to explore in herbal brewing. It has a rich history of being a flavoring and preservative in beer for hundreds if not thousands of years throughout the northern temperate regions of the world. In Europe, the young shoots and cones of the Norway spruce (Picea abies) were boiled down into a thick paste, resembling malt syrup. This extract, also known as spruce essence, could be stored throughout the year and used to make beer. In North America, the shoots of black spruce (P. mariana) were favored, even though the apparently foul-tasting white spruce (P. glauca) is relatively more common and widely distributed.

DSC_0763

The fresh spring shoots were favored for brewing, and to a lesser degree the young cones that mature throughout the summer. These tender parts of the plant contain the highest concentration of vitamin C, resins and turpentines, which are responsible for the characteristic, pungent scent of spruce and other closely related conifers. Spruce beer was usually brewed for the sole purpose of being a winter tonic. Due to spruce’s high vitamin C content, it was very much needed during the winter months to prevent scurvy from a lack of fresh fruit or vegetables. Although this is not usually much of a problem facing current society, it was a real reality in centuries past. Additionally, spruce beer was also consumed as an astringent, stimulant and restorative that helped keep the body clean and pure during the sometimes monotonous diet of late fall and winter.

I collected the young shoots of a Colorado blue spruce (P. pungens) which is a particularly strong scented species. It is also one of the most common if you live in a city; it’s hard to find a yard on residential block that does not have one of these vividly blue spruces planted. Figured I might as well use the spruciest of the spruces. I also included some chamomile to this recipe; later on in the boil to preserve the delicate aromatics and to mellow out the harsher aroma and bitterness of the spruce and hops with a lighter, calmer astringency. Plus I had quite a bit of chamomile, and wanted this recipe to be loaded with depth and interest.

Ingredients:

– 4 gallons water
– 3 liters liquid amber malt extract
– 6 ounces fresh spruce tips
– 1 ounce dried chamomile blossoms
– 30 grams Perle hops
– 7 grams brewers yeast

Instructions:

Bring a half gallon or water or so water to a boil, then pour and stir in liquid amber malt extract until dissolved. Once boiling again, stir in the 30 grams of Perle hops and half (3 ounces) of the spruce tips. Set timer to 30 minutes. After steadily boiling and with the occasional stir for 25 minutes, add a 1/2 ounce of chamomile blossoms and the rest of the spruce tips. After 30 minutes as passed, remove from heat and add the rest of the chamomile, stirring to incorporate. Place in a cool/cold location to cool down, with the lid on, to at least 100 degrees F. Once cooled, strain and pour into sterilized fermenter. Add water until a total of 4 gallons is reached and then mix. Once settled, pitch yeast and insert airlock.

Yarrow & Calendula Honey Mead

Calendula officinalis

T’is the season! Maybe. Is there even a season for mead? It feels like that season should be right because this is when I felt like making another batch of mead. I really enjoyed making growler sized batches in the past. It’s less of a committment and lets you save money and ingredients while experimenting.  Or split up a larg batch by fermenting in many indivdual fermenters and adding different ingredients. Whatever you want! Mead is really versatile, and I have never made a bad batch except-but-not-really my first, which was a duo-project: a juniper mead that I thought was brilliant but apparently to some it tasted like olive oil. I don’t get it either.

Yarrow is a great ingredient for mead, as fellow BFB-er Jesse Black has demonstrated in a previous post describing his own yarrow mead recipe. It’s bitterness and astringency neutralize sweetness and the floral, terpentine and cedar or sage-like aromatics add wonderful personality and flavour. Yarrow is also powerfully medicinal; disinfecting, reducing swelling, irritation, inflammation or pain and detoxifying the blood and urinary system. Calendula petals were added to impart a strong golden or orange color to the finished mead, as well as slightly thicken and add silkiness to the texture.

INGREDIENTS: (for 2 litre batch)

– 2 litres water- half pound of honey
– 0.4 ounces dried and fresh yarrow leaves
– 1/4 cup dried calendula petals, lightly packed
– 0.5 grams champagne yeast
– 2 grams yeast nutrient

INSTRUCTIONS:

Bring 1 litre or so of water a boil. Once boiling steadily, gradually add honey and continue to stir until dissolved. Add half the yarrow leaves (approximately 0.2 ounces) and stir until throughly moist. Cover only slightly and allow to simmer for 20 minutes. Pour calendula pedals and the remaining yarrow into growler or other suitable fermentation vessel. Pour hot honey wort into growler, while straining out the boiled yarrow. Wait 5-10 minutes to allow the fresh yarrow and calendula petals to steep in the hot mead before topping up with another 1 litre of cold or room temperature water. Place cap or lid on growler/fermenter until room temperature; approximately 3-4 hours. Once cool enough or only slightly warm to the touch, remove cap/lid and add yeast nutrient and champagne yeast. Give one last stir and plug in the air lock: only straining out the herbs when it is time for bottling.

Carrot Seed Ale

wild carrot (Daucus carota)

Anyone who has tried the seeds of parsley or celery already has a general idea as to the flavour profile of carrot seeds. These plants (as well as dill, fennel, cumin, lovage and parsnip among many others) are all members of the Apiaceae, a botanical family. Although unique, all of these plant seeds have a recognizeable pungent, aromatic and almost ‘pine-y’ aspect to their aroma and flavour. This characteristic set of attributes was certainly not overlooked centuries ago when the seeds of wild or cultivated carrots (the plant Daucus carota) were used as a complimentary ingredient or substitute for hops in beer. I have paired wild harvested carrot seeds with 2 different hop varieties into what I hope will turn out to be a very beautiful combination of earthy aromatics and complex bitterness.


INGREDIENTS:

4 gallons water
3 litres liquid amber barely malt extract
2 ounces freshly ground ripe carrots seeds (1 ounce = 60 min. boil; 1 ounce = 10 min. boil)
30 g both Perle and Fuggle hop (Fuggle = 60 min. boil; Perle = 10 min. boil)
7 grams be-bittered ale yeast


INSTRUCTIONS:

Please refer to my older posts for more of a step-by-step guide to brewing beer. I feel like at this point I am just repeating myself over and over, especially for those of you that are reading this blog every once and a while and probably getting tired of it. For my next batch of beer (still in the works), I think I am going to try putting the wort through a secondary fermentation.

This is basically just draining the beer, after it has fermented and gone dormant once, into a new sterilized fermenter and letting it undergo another partial fermentation. By doing this you can be sure that the final product has had the majority of the available sugars converted into alcohol. Because the secondary fermentation works with relatively little sugar available in the wort, the vast majority of which was eaten up during the primary, this next fermentation is slower and more complete, digesting some of the more complex sugars.


CREEPING CHARLIE ’13 UPDATE:

This isn’t going to make anyone happy. It certainly didn’t improve the quality of my day. About 2 days into fermentation, the 6 gallon capacity glass carboy that Charlie was humming away inside exploded, sending frothy herbal goodness sloshing all over fellow BFB-er Robert Nagy’s basement bathroom. It was a pretty big bummer. I think that this new addition of the Creep was too good to be true: and the pure awesomeness that it held within it’s beer-y depths was too much for physics to handle. Next time, only 4 gallon batches in the 6 gallon carboy. Either that, or use a bucket which was a bit more give.

According to other BFB-er Chris Veska, the airlock may have prevented enough CO2 from escaping, a detail which could have saved this brew from it’s premature end. Even putting tin foil over the opening of the carboy, once the fermentation is in full swing, is enough to protect the wort inside from any ‘badies’ that might try to get it. Makes sense, seeing as a beer in full fermentation is pretty aggressive. Oh well, live and learn. This also means that Creep ’14 is going to have to be even more serious than ’13 or ’12.

Creeping Charlie ’13

Creeping Charlie

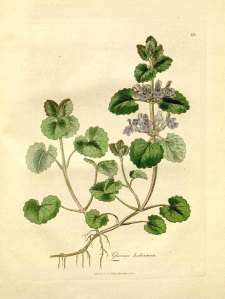
Glechoma hederacea or creeping-Charlie

I can’t believe I didn’t post the first trial run of this highly anticipated recipe that Robert and myself conjured up last summer. You can’t possibly understand how upset I am with myself over this. I really liked that beer and was really looking forward to making it and trying it out. ‘Creeping Charlie’, or simply ‘Creep’, was made with pale and dark liquid malt extract, Cascade hops and a whole bunch of freshly harvested ground-ivy (Glechoma hederacea), which is a thin, sprawling perennial herb in the mint family with fragrant, kidney shaped leaves and small purple tubular flowers emerging in late spring and early summer. It was ‘heady’, bold, more well-balanced than bitter, and strange. So, it’s the kind of stuff I like.

Ground-ivy, also known as creeping Charlie by some gardeners, is an easily overlooked plant native to temperate and northern Europe (invasive in North America) that has a rich history as a hop-substitute in traditional beer recipes. It was deliberately added to batches to add it’s own slightly minty, floral bitterness and to make the beer more ‘heady’ due to the saponins (chemicals that produce suds) contained in the plant that boil into the wort. Unfortunately, the use of ground-ivy practically vanished after it was replaced by hops as the standard bittering and preservative herb in the late 1800’s via the German Beer Purity Act which expanded later to include all of Europe.

The exact amounts of ingredients added to the first recipe have been lost due to my terrible book keeping skills, that thankfully since last year, have improved considerably. So this time around, I actually decided to do the responsible thing and carefully measure out everything that I could and write it down. Brilliant.

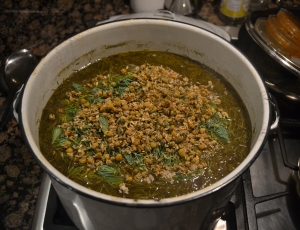
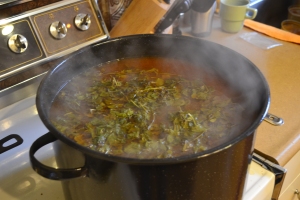
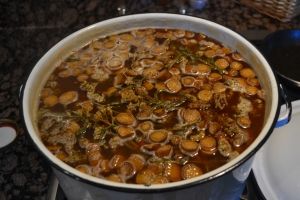
Just making some delicious beery soup.

Just making some delicious beery soup.

INGREDIENTS

– 5 gallons water
– 4 litres pale liquid amber barley malt extract
– 40 grams mystery hops (possibly Cascade) for bittering
– 10 grams Fuggle hops for bittering and flavour
– 30 grams Perle hops for flavour and aroma
This is my favourite ingredient: a large paper LCBO bag loosely stuffed about halfway with the dried, uncut trailing flowering stems of ground-ivy. Understand how much that is? Good, let’s proceed.
– 13 grams Nottingham English ale yeast
– 1 Irish moss tablet


PROCEDURE

For the sake of not being incredibly redundant, I am going to keep this procedure short and sweet, as they say. If you would like more of a how-to / common mistakes / details guide to making beer in your kitchen, please consult my past 2 or 3 posts where I discuss the specifics of doing this properly and not like someone that’s going to wreck their whole kitchen and spoil their beer. Thanks friends!

Bring water to a boil. Add malt extract, about 85% of the ground-ivy, and maybe-Cascade hops. Set timer to 60 minutes and stir ingredients in until a boil has returned. After 30 minutes has passed, add the Fuggle hops and stir them in a bit. After 50 minutes have passed, add the Irish moss tablet, the rest of the ground-ivy and the Perle hops. Stir until the tablet dissolves, about 3-5 minutes. One the timer stops, remove the wort from the heat and leave to cool to room temperature. Once cooled, strain into your fermenter and top up the water level until 5 gallons is reached. Stir to mix, pitch yeast and insert airlock.

I really enjoyed the infamous Creeper 2012. It was a very interesting experiment and I leaned a lot about the flavour profile, aroma and texture that it infuses into the beer. It was more of a sweeter, porter / weak Belgian ale hybrid that was a bit all over the place. Oh, that’s right! We also added brown sugar to the recipe. I remember that now. That is what gave it the sweetness common to candied ales which are made with caramelized sugar. So yeah, it was pretty wacky and unpredictable. Probably fooled around a little to much, but whatever. It’s whatever it was and I enjoyed drinking it, especially after it ages for around 6 months to a year. It chilled out a bit. But the allure of an American Pale Ale that’s quite malty, but also refreshingly bitter, citrusy, and possesses that dark, floral bitter-mint spice of creeping Charlie. Here’s take two.

Earthhop Gruit Ale

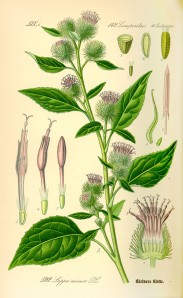
Illustration_Arctium_minor0

greater burdock (Arctium lappa)

Jordhumle is an old-time Scandinavian name for yarrow (Achillea millefolium) meaning earth hops. This is a play on the plant’s historical use as a bittering and preservative agent in ales commonly used in communities until the 18th century, when bitter resin in the unripe female flowers of hops (Humuls lupulus) became the preferred ingredient of choice. It’s also a term, among many that are no longer in common use, that can describe any herbs that were used as a substitute for hops up until the point that hops was legislated in as the only legal herbal preservative in beer.

Anyhow, I found this old nickname extremely appropriate to describe my newest gruit style ale, which features the bitter, resinous scented flowering tops of yarrow and the deep, woodsy aromatic and bitter-sweet tasting roots of burock (Arctium lappa). Burdock, the plant that graciously supplies us with burs to get caught in our clothes, bears a 1-3+ foot long taproot which has long been used as an ingredient in strengthening, blood purifying tonic beers taken in the spring to cleanse the body from a monotonous winter diet lacking in fresh fruits and vegetables. The roots, rich in iron, calcium and other minerals, can also be used to improve the function of the liver and revive a sluggish digestive system by stimulating digestion before and after a meal.

Yarrow was an even more popular ingredient in centuries old beer recipes, being added for it’s potent anti-inflammatory and anti-bacterial properties.  The leaves and flowering tops can be used medicinally to prevent headaches, clear sinus congestion, sooth sore throats, quell aching teeth, relieve thirst, improve digestion, prevent heavy and painful menstruation, fight viral and bacterial infections, stimulate the recovery of injuries, stop heavy bleeding, disinfect wounds and assist with countless other maladies. The inclusion of yarrow in a recipe was also believed to make the resulting beer more intoxicating, much the same as Labrador-tea (Ledum groenlandicum and spp.) which has narcotic-like effects when taken in large enough doses.

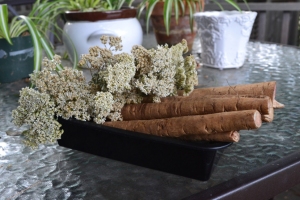
DSC_0455

Dried yarrow flowers and fresh burdock root

I have been wanting to use both of these herbs in a recipe for a long time. I am sure that they could both be featured in their own individual recipes to extenuate their own unique personalities, and that is most definitely going to happen at some point. I am hoping that this recipe will create a slightly bitter ale with a deep aroma of damp moss and rotting logs complimented with a balanced resinous, woodsy and floral flavour.

INGREDIENTS

5 gallons water
3 litres liquid amber barley malt extract
6 ounces fresh or 3 ounces dried burdock root, coarsely sliced.
1 ounce recently dried flowering tops of yarrow
20 grams Cascade hops
1 powered Irish moss tablet (helps with clarity)
15 grams de-bittered ale yeast

INSTRUCTIONS

1. Bring either 1 or 1-5 gallons of water to a boil. Make sure that the pot is only around 50% full in order to accommodate the addition of the next few ingredients.

2. Carefully add the liquid amber barely malt extract to the water. This is going to be an annoying, sticky mess no matter what but be advised to take some precautions. Stir while adding the malt so it doesn’t burn at the bottom of the pan. Try to get as much of it out of the containers as possible. It might even be worth while to remove the pot from the heat until all of the malt is in there and dissolved evenly.

3. Bring the water back up to a boil and add the sliced burdock root chunks and yarrow flowers. The yarrow can be added whole because it limps up quite a bit. Set timer for 30 minutes.

DSC_0457

Freshly added herbs simmering in the boiling malt

4. Reduce the heat to a simmer and cook the herbs and the malt for 15 minutes. Stir occasionally, as the herbs like to float.

5. Once 15 minutes has passed, add the Irish moss tablet and the 20 grams of Cascade hops, sprinkling them slowly into the wort. Stir until the Irish tablet completely dissolves, about 2 or 3 minutes. Hops has a tendency to make the brew foam like crazy, so keep stirring and turning down the heat until you have a consistent simmer. If you full on boil it, the wort is going to throw up all over your stove. Whenever you are not stirring, you can have the lid on the pot to retain heat but with a slight crack. Also, don’t leave the room after the hops is in there. Keep an eye on it for the first 5 minutes especially once it goes in.

6. Once 30 minutes has passed, turn off the heat. Remove the now finished wort into a location where it can sit and cool down, with the lid covering it. I stick in a thermometer to monitor the temperature as it cools. You want the wort down to at least 100 °F (optimally 70-75 °F) before you proceed with the next step.

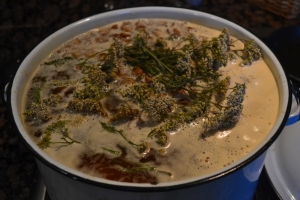
DSC_0458

If your beer looks like soup, you’re doing it right.

7. Using something like potassium metabisulphite or Diversol, sanitize a carboy or fermenting bucket, funnel, strainer and airlock (make sure that it is fitted to your fermenter).

8. Strain and pour the wort through a funnel into your fermenter. Top up the carboy with water until a total of 4 gallons is reached. I wrote in with a permanent marker the measurements on the outside of my glass carboy, which makes this easy. I suggest you do that too, on whatever you are fermenting in for future reference.

8. Pitch in the 30 grams of de-bittered ale yeast (It is a good idea to let it sit out the night before so it is room temperature when you add it) into your fermenter with a funnel and insert the airlock. Done. Now clean up the huge mess you’ve made and wait 5-7 days until fermentation is complete.

Dreamweapon

Dreamweapon Herbal IPA

 Image of Illustration of VALERIANA officinalis L. 47

Valeriana officinalis

This recipe sort of came out of the blue, featuring some herbal ingredients that I had lying around and were nearing the end of their shelf life. What better way to preserve the health and healing capability of herbs than steeping them into a beer, which can last for months if not years if properly stored? Tinctures work much the same way, except they can last even longer considering they are often made with 30-40 % alc.vol. liquors. If you get the reference in the name I chose for this beer, you are one awesome dude/dudette. If not, I am not going to give you the satisfaction outright and you are going to have to do a little bit of googling around to figure it out.

The name is relevant though, trust me, since I have formulated this one to be the perfect compliment to the end of an evening. Not too forceful, but you are definitely not staying awake for the rest of that movie once you crack one of these buddies open. Featuring chamomile (Matricaria chamomilla) blossoms and valerian (Valeriana officinalis) root, this wildly and differently flavored India pale ale is bound to cripple your chances of staying up late. Both of these herbs gently tone the central nervous system, relax muscle tension and sooth fried nerves and clouded minds. They both help prepare the body for rest by sedating and calming your entire body. Valerian can even be used throughout the day: it helps to naturally restore your body’s sleep rhythm and therefore will only help you sleep when you ought to be sleeping- at night time. Valerian and chamomile can lessen the severity of, or prevent altogether, muscle spams/cramps that can be associated with a host of normal or abnormal bodily functions.

Ingredients:

4 gallons water
3 liters liquid amber barley malt extract
1 ounce dried chamomile blossoms
25 grams Cascade hops
0.4 ounces chopped and dried valerian root
8 grams de-bittered ale yeast

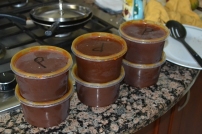
Liquid amber barley malt

Liquid amber barley malt

DSC_0259

Chamomile blossoms and Cascade hops.


Directions:

1. Bring one gallon of water to a boil.
2. Add liquid amber barley malt extract, pouring slowly and stirring to prevent burning.
3. Add valerian root, stirring a little to evenly spread it around. Start timer at 25 mins.
4. When there is 10 mins. of the boil remaining, add chamomile blossoms and hops. Stir again to dissolve.
5. Once timer goes off, remove from heat and allow wort to cool in the pot until it is around 60-75 degrees F.
6. Fill sterilized carboy/bucket with 3 more gallons of water and wort, adding the wort slowly along with the water so the two mix together as thorough as possible.
7. Wait until head dissipates and then pitch yeast.
8.  Insert sterilized airlock and wait until fermentation is complete (5-7 days usually)

DSC_0260

Finished wart ready for brewing.

If anyone else reading this is interested in pursuing some experimentation with herbs in brewing, I highly recommend this. It has a pretty comprehensive list of most common and a few unusual herbs/trees that are of were historically used in brewing for various reasons. This is where I got the quantities of the herbs that I used for this beer. Smells pretty good already, so I am pretty confident that the folks at the California Fermention Society know what they are talking about.

Update: Pis en Lit G’root’ Ale

This beer has taken me on a real ride. Yesterday, I transferred the 4 gallon batch of this liver cleansing dandelion and milk thistle ale into my second carboy, attempting to filter out all of the yeast and herb parts that I left in during primary fermentation. This beer has been fermenting for 3 and a half weeks, way longer than a beer that was supposed to be straight forward and take less than 10 days to ferment. I did initially have to pitch the yeast in a second time, for 5 days after initially adding yeast I didn’t see any sign of fermentation. I don’t think this would have impacted the length of the fermentation though, because I have had to do this before and the batch still fermented at the regular expected time.

So, who knows? I don’t. It may have been due to fluctuating temperatures in the basement, or possibly warding off some unwanted bacterial colony that may have attempted dominance of the wort. I tried a little sample of the beer, even though it is not yet carbonated. It is pretty damn strong, I am estimating 8-9% alc.vol. which is way off the charts for the expected 5% alc.vol. The flavor is a little heavy on the malt, but with a the damp woody bitterness of dandelion.

Right now I am just going to wait until the beer stops fermenting during secondary. It might be later this week, or it might keep going for another few weeks. Thought I would free up the first carboy in order to make this beer. Can’t stand to not be brewing, even if it is a brew that is holding me up. Any suggestions/comments as to what I might have done to mess up (but not really) Pis en Lit would be appreciated.